Virtual Presence
PROJECT OVERVIEW (WIP)
I am creating virtual avatars for each one of our team members to use within our Collaboration VR and AR apps. Using 3D scan data as reference to quickly build custom avatars, and applying SALSA blend shapes for facial deformation, lip syncing to mic input / Photon Voice chat, and RandomEyes for blinking and eye gaze control.
Note: The 3D models are a bit out-dated and might not look as accurate since I lost weight since then. (30 lbs lighter)
Collaboration VR is a cross-platform shared VR experience aiming to replace teleconference / WebEx meetings with a much more efficient and engaging form of collaboration.) Up to (4) users can meet remotely within a virtual space, and using an interactive tablet can present 2D slide shows, videos, 3D models, trigger animations, and load entire 360 environments for immersive data visualization.
Collaboration AR built for the Microsoft HoloLens (video embedded below) allows two users (so far) to meet remotely and present shared content (3D models, animations, videos, data visualizations) with positional and rotational head tracking, and audio-based lip syncing. Hand-presence in-progress. This was put developed rather quickly in 2 weeks.
Responsibilities: Creative Lead, research and development, 3D modeling/animation, rigging, Unity integration
CREDITS
Client: Infosys
Platforms: Oculus Rift, HTC VIVE, HoloLens
Launch Date: Work in progress.
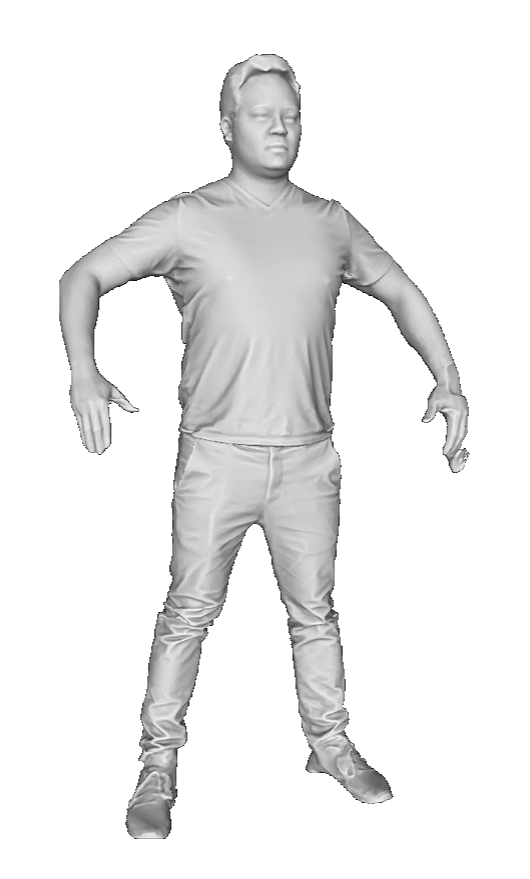
The more reference, the better.
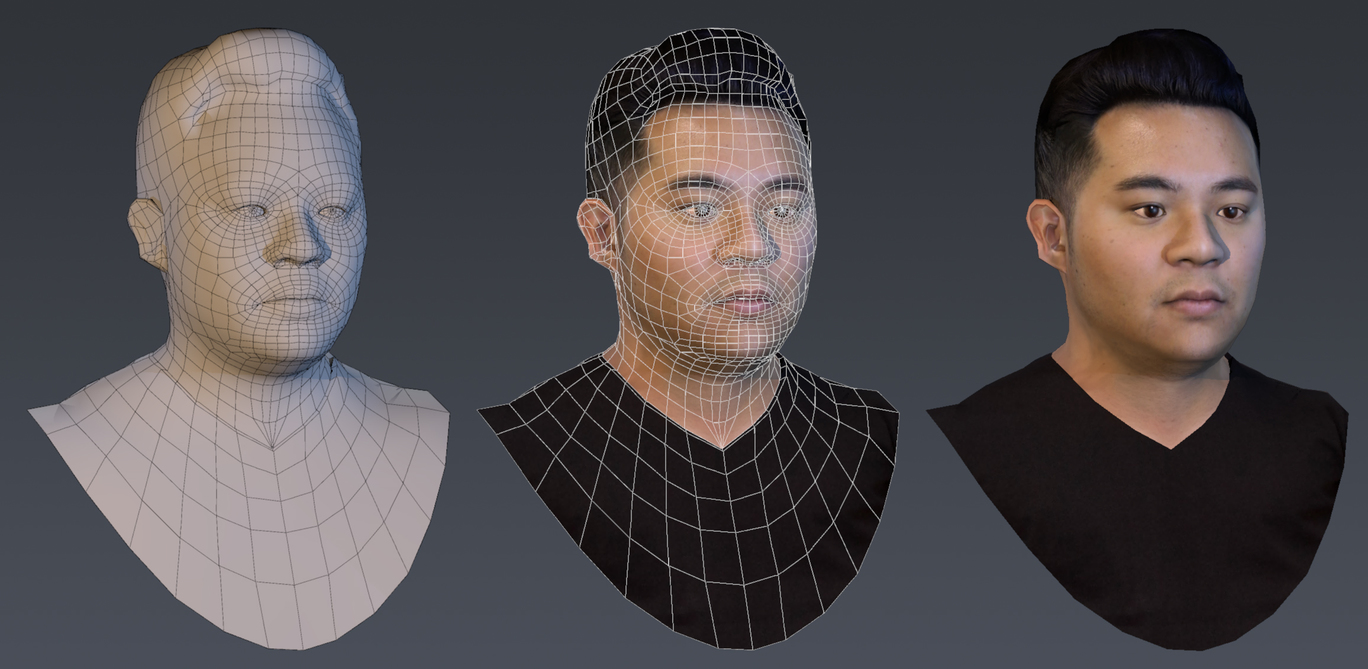
A few of our team members were scanned using the Artec3D Shapify booth. Each scan takes about 12 seconds and you are given a very dense mesh with 500K+ polygons of your entire body. Bellus3D also has an app that provides a much higher resolution scan of your face using an iPhone X or tablet. These are way too heavy to use as is, but I used them and proved to be a great reference and starting point.
Developing a workflow.
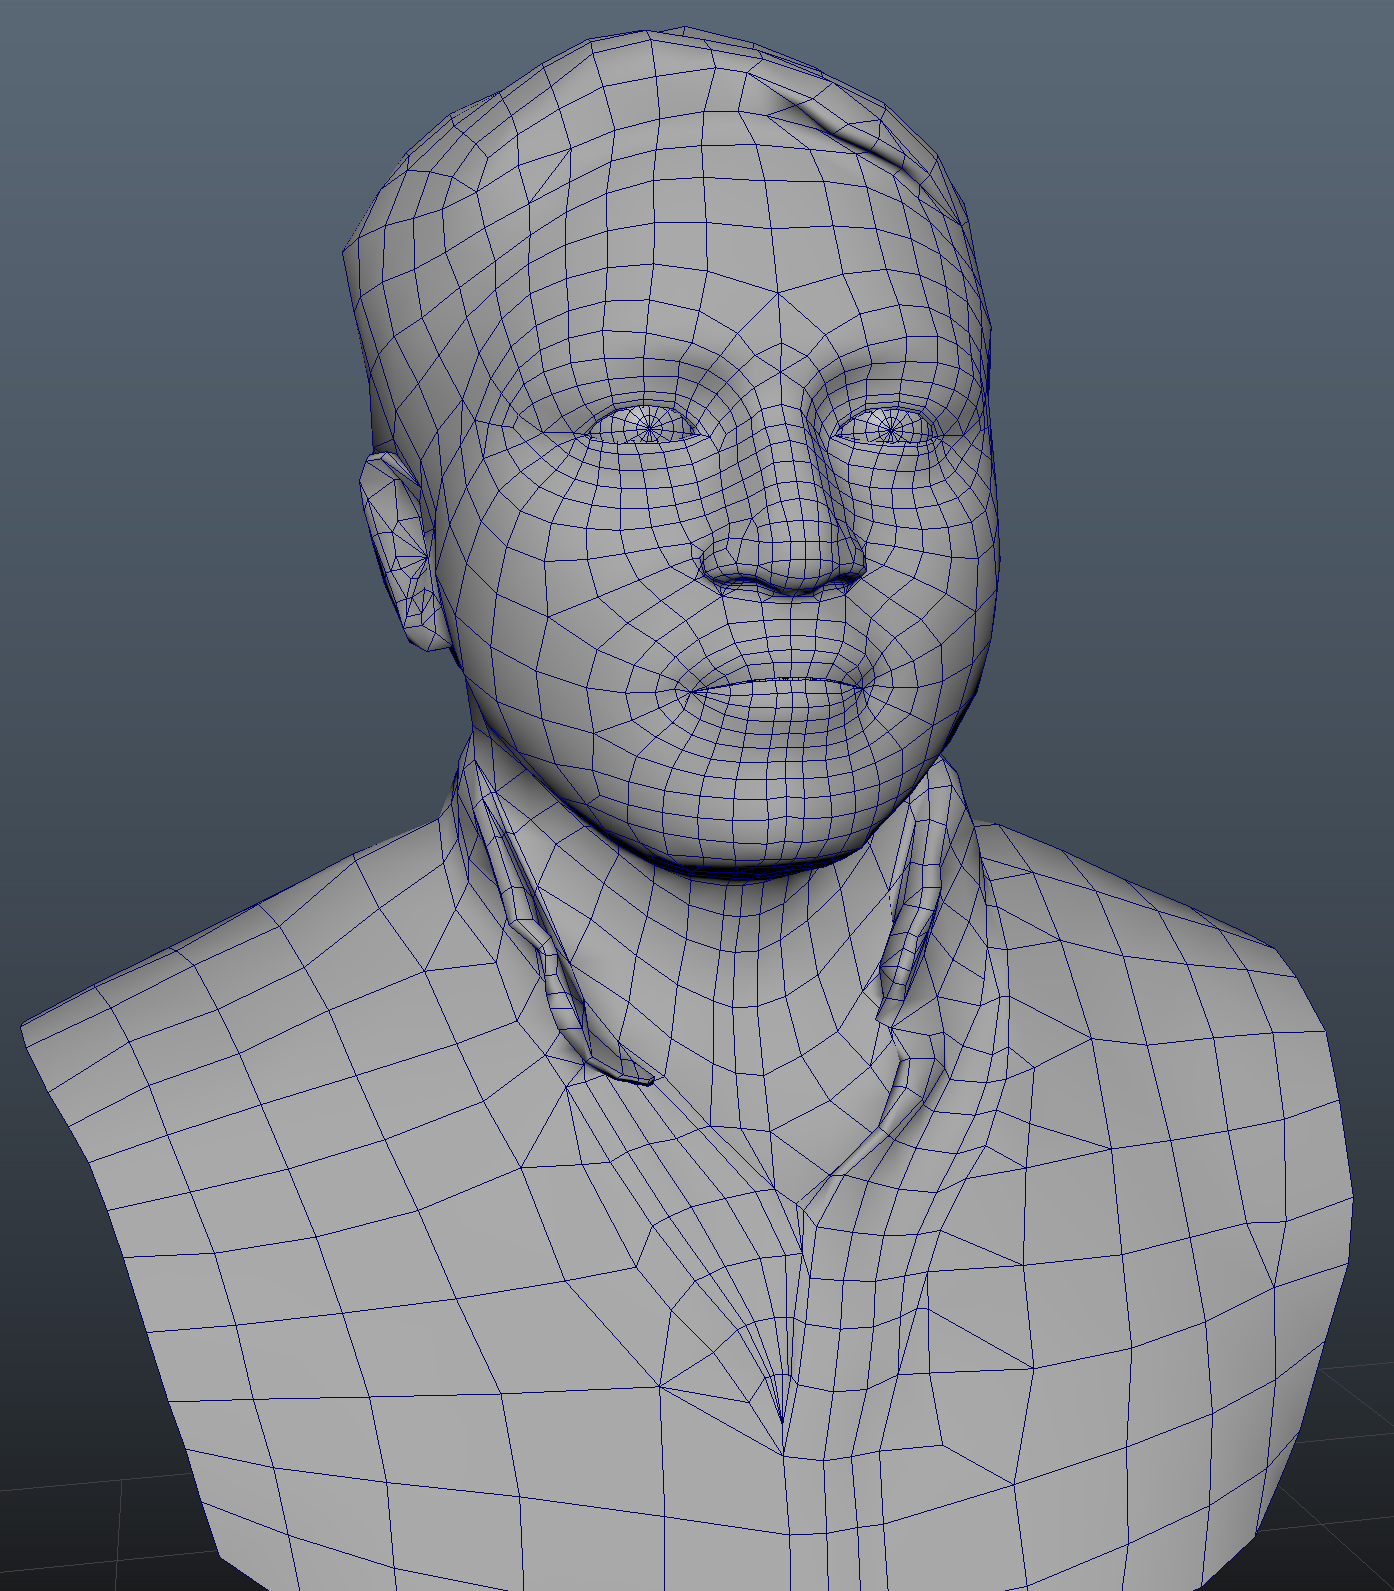
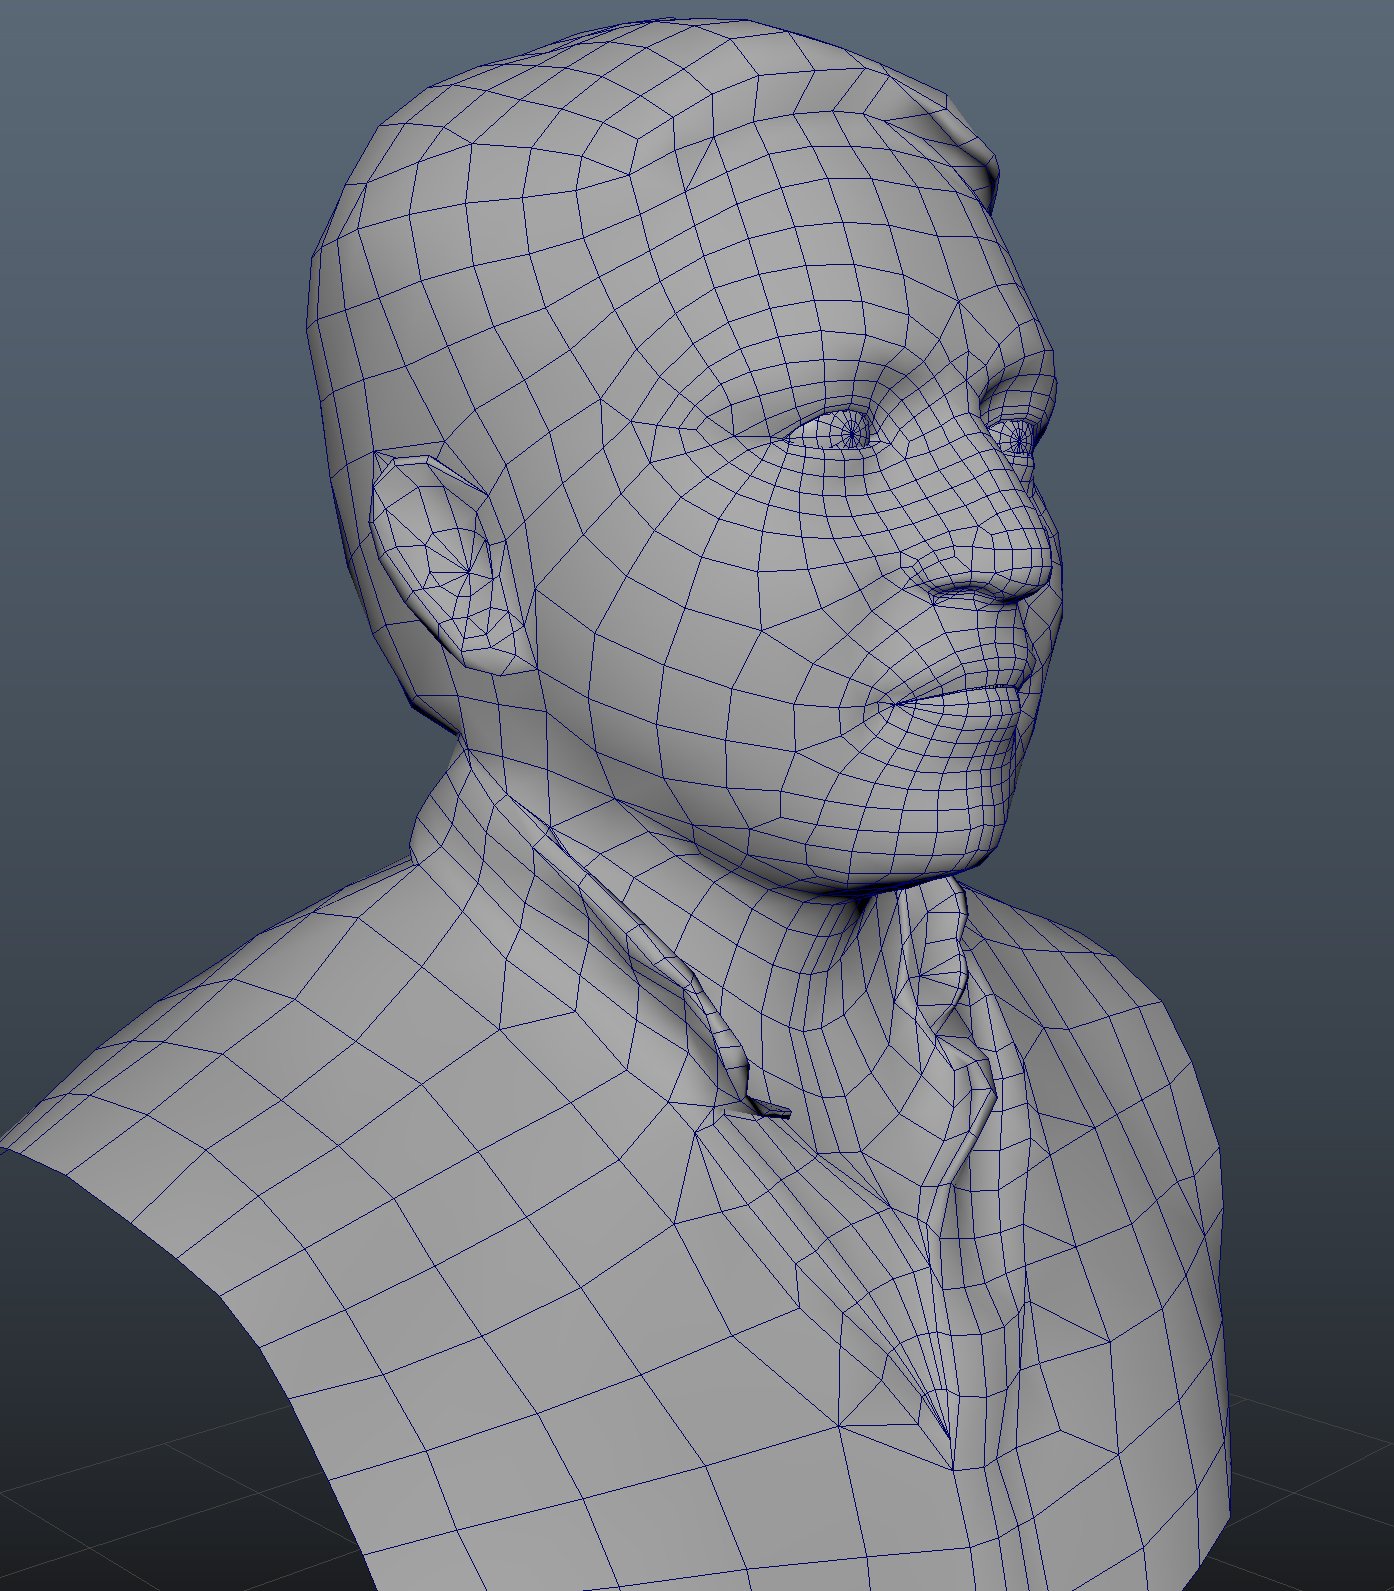
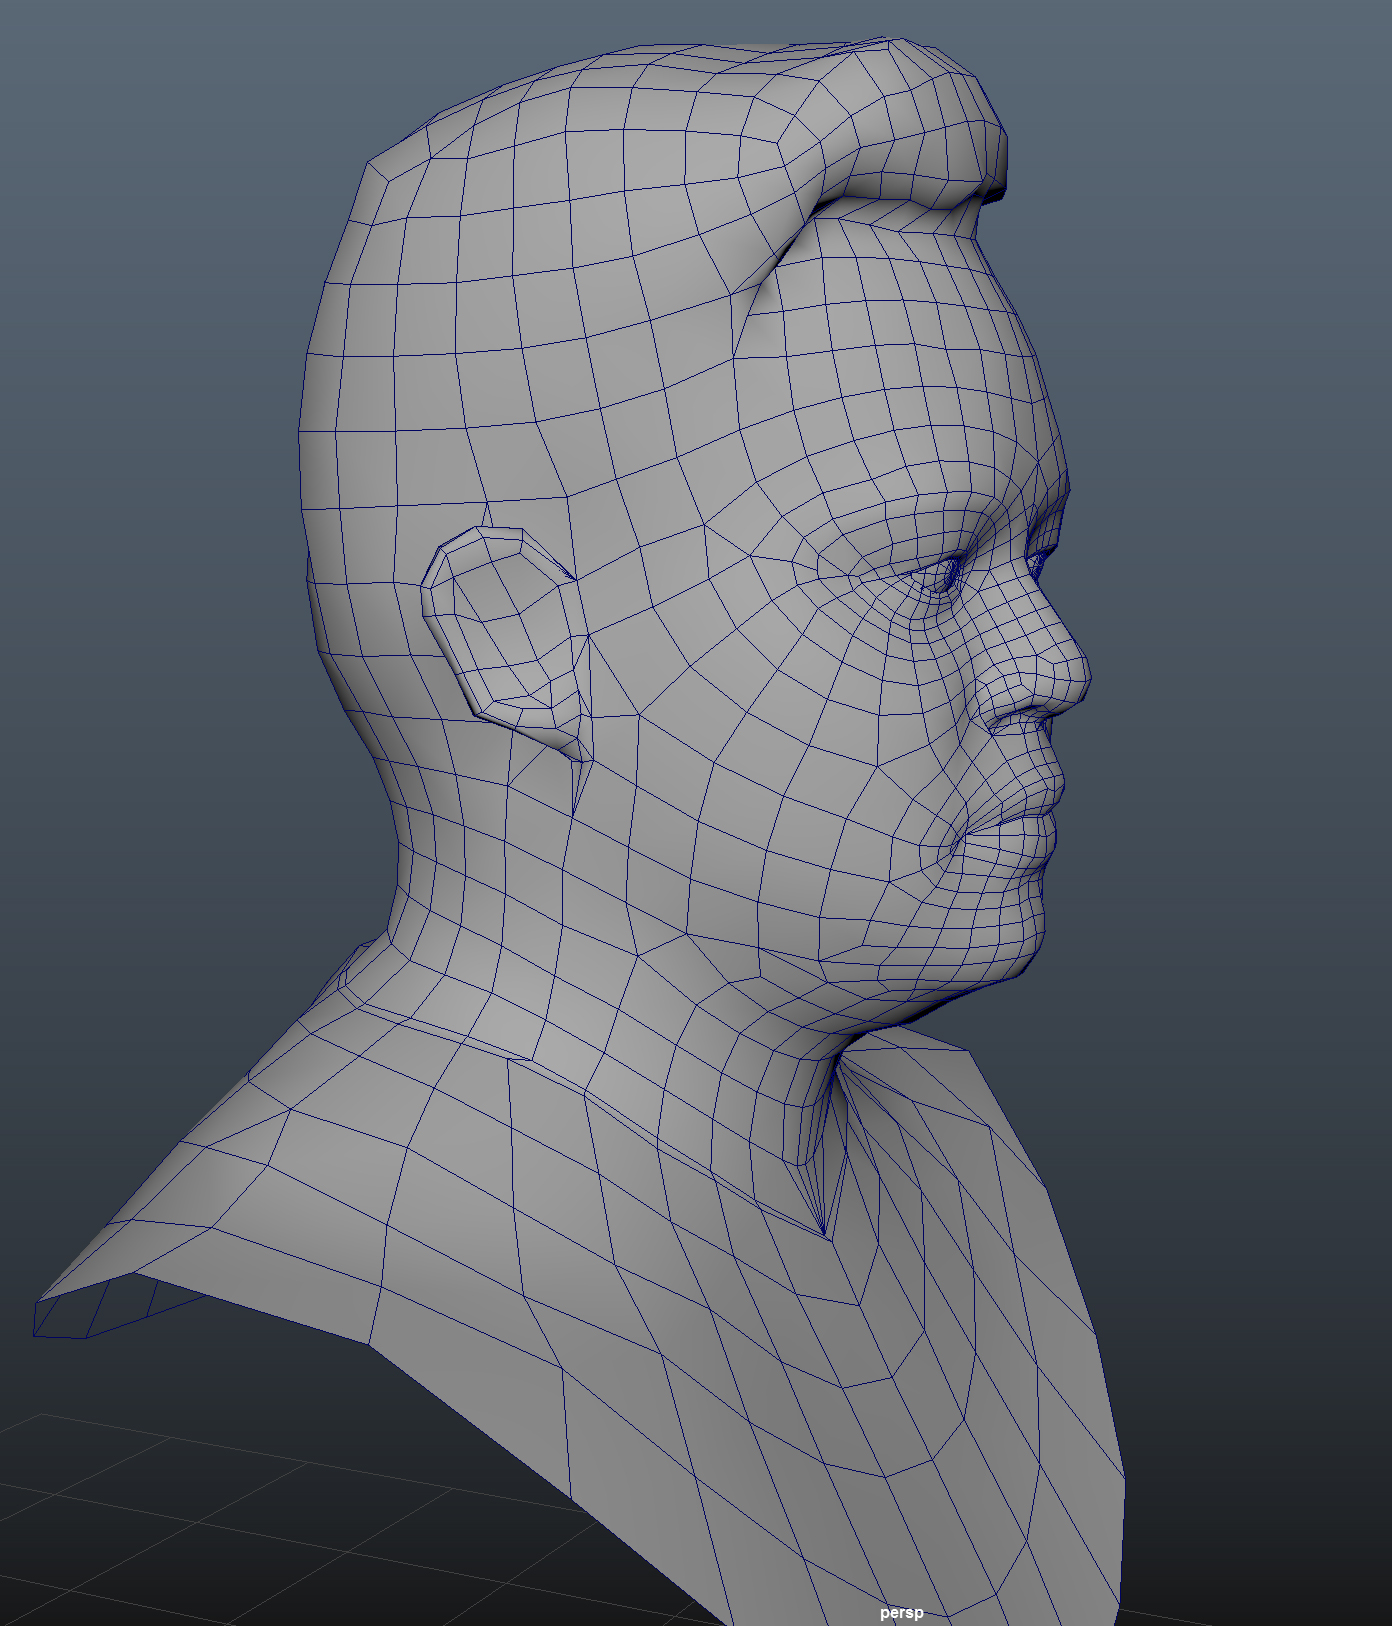
3D Modeling.
Within Autodesk Maya I used Quad Draw tools and quickly built an optimized VR-Ready character model using the scan data as a template, and setting it as a live surface. I could then snap vertices of a new topology and layout edge loops in preparation for quality facial deformations.
Shrink Wrap Technique.
Once I had one head model that I was happy with, I was able to use that as a starting point and shrink wrap the topology to a new head. Tweaking was easy since I had a high resolution mesh to snap to.

Bringing the avatar to life.

Blend shapes are used for blinking and talking.
Simple Automated Lip Sync Approximation uses these (4) blend shapes and is much faster and easier to set up vs. phoneme mapping. The avatar lip sync works with live mic input, pre-recorded audio, as well as voice chat.
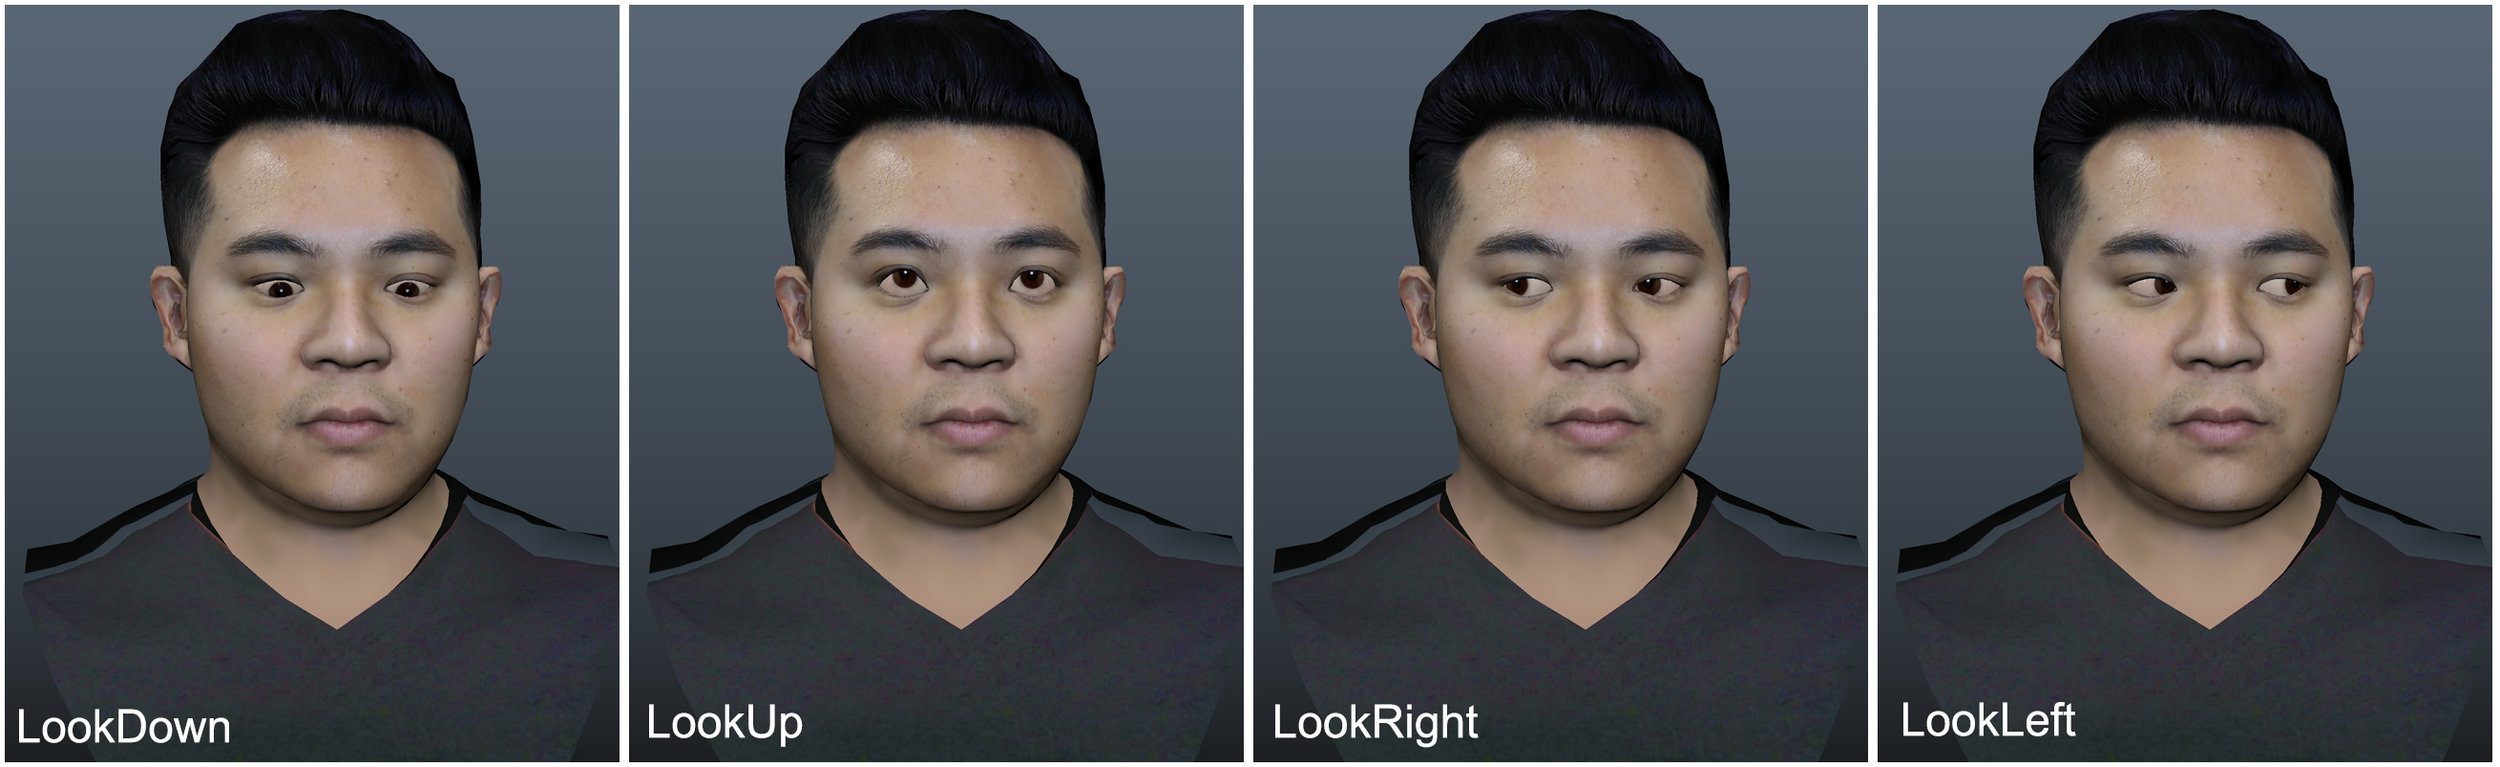
“The eyes are the windows to the soul.”
The eyes really bring a character to life. By incorporating eye direction and facial expression blend shapes, the avatars can blink and look around at realistic intervals. Parameters were set so that the avatars attention is directed when someone else is talking.
Animation
Using Final VR Inverse Kinematics solution I was able to map the headset pivot to the characters head and the wrist joints to the touch controllers.